
As mentioned in my past blog, hope you downloaded the Eclipse IDE.
1) Extract the zip / tar file to get the portable eclipse (no need to install).

2) Once you click on the eclipse.exe, it will ask the path of workspace, either you can chose the default or create own folder and copy paste the path for workspace.
Workspace path is required to store all your projects and files.
3) Once Eclipse IDE is opened, click on the File -> New -> 'Java Project', and type project name(Let's say MyProject),
leave all other options as it is and click on 'Finish'

4) You will get the 'MyProject' just created, on the left side pane:

5) Right click on the 'MyProject', Click on New -> Package, Type 'myPackage' and click on 'Finish'

6) Right click on the 'myPackage', Click on New -> Class, Type 'testClass' and check the checkbox as highlighted.
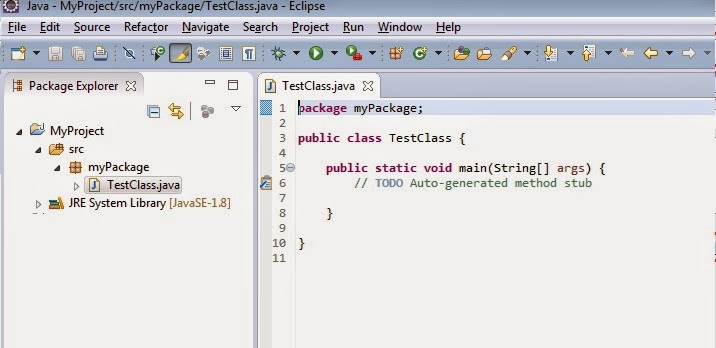
 7) Click on the 'Finish' to get the below screen, can write code under the main() method:
 8) Import required selenium jar files (Downloaded as per past blog "Selenium Client and Webdriver language bindings:") by
Right click on the 'MyProject' and click on 'Java Build Path'
Navigate to the tab 'Libraries', click on the 'Add External JARs...' and add all the jar files.

1) Extract the zip / tar file to get the portable eclipse (no need to install).
2) Once you click on the eclipse.exe, it will ask the path of workspace, either you can chose the default or create own folder and copy paste the path for workspace.
Workspace path is required to store all your projects and files.
3) Once Eclipse IDE is opened, click on the File -> New -> 'Java Project', and type project name(Let's say MyProject),
leave all other options as it is and click on 'Finish'
4) You will get the 'MyProject' just created, on the left side pane:
6) Right click on the 'myPackage', Click on New -> Class, Type 'testClass' and check the checkbox as highlighted.
Right click on the 'MyProject' and click on 'Java Build Path'
Navigate to the tab 'Libraries', click on the 'Add External JARs...' and add all the jar files.
To import any other .jar files later time, follow step 8.
No comments:
Post a Comment